Tuesday, December 31, 2013

Easy DIY Men's Crocheted Hat

Happy New Year's Eve everyone! In all my crafting for Christmas, I didn't make my husband anything. Needless to say, he felt a bit left out. He wanted me to make him a beanie style hat, or toboggan as he refers to them (weird! I know!). Here is a super easy men's hat that I made using a tutorial on YouTube. I'll link you to it at the bottom.
You'll need an H or I size crochet hook and a small weighted yarn. It would be helpful to know how to make a chain and a single crochet stitch before beginning. The whole hat is done with a single crochet stitch which makes it a great simply project if you're a beginner. All in all it only took about 2 1/2 hours and I'm not a quick crochet-er ;).
The hubs was kind enough to let me take his picture while wearing it.
Here's the link: http://m.youtube.com/watch?v=KobDydvvmmU&desktop_uri=%2Fwatch%3Fv%3DKobDydvvmmU

Happy crafting and Happy New Year!

Welcome Home.
 

Monday, December 30, 2013

Healthy Toddler Bran Muffins


Welcome back winter, where have you been hiding? Saturday it was 50F and today (Monday) the high is 25F. Nothing like a cold day to make a baker out of anyone. Today I made bran muffins. I made this recipe with my toddler's breakfast in mind but they are delicious for my whole family! A friend of mine told me about this muffin recipe. They turned out great... but you know me, I have to experiment. ;) 
Here's the link to the original recipe: 
http://impressiveengineering.com/the-evolution-of-superman
Now I'll share the recipe as we make it in our house. I found it to be a really great base recipe and it made 6 dozen mini muffins! Step 1 - Make coffee ;)

Here is what you'll need:
1 c hot water
2 c bran cereal
1/4 c butter 
1/4 c applesauce
3/4 c sugar (1/4 c less than original recipe)
2 eggs
2 c buttermilk (or whole milk with 2 TSB of vinegar- more on this later)
1 1/2 c whole wheat flour
1 c all-purpose flour
2 1/2 tsp baking soda
1/2 tsp salt
1/2 tsp cinnamon (optional)
2 tsp vanilla (optional)
1/2 tsp banana extract (optional)
Addition 1 c bran cereal (you'll see why)

How She Does It:
Preheat your oven to 400F
Mix hot water and 2 c bran cereal together and set aside. If you don't have buttermilk then mix 2 c milk and 2 TBS vinegar and set aside for 5 minutes. 
Cream together butter, applesauce, vanilla, sugar, & eggs.
Mix in the buttermilk.
Add flour, salt, cinnamon, & baking soda and mix until fully incorporated.
Add water bran cereal and combine. 
Lastly add the dry 1 c bran cereal.

Fill greased mini muffin tins 2/3 full and bake for 10-12 minutes.


I froze 4 dozen. Start with 10 minutes on a plate in the freezer then transfer to a freezer bag. It's not the quickest recipe but definitely an easy one and my freezer is now well stocked with a healthy breakfast option. I hope y'all enjoy.

Welcome Home.

Saturday, December 28, 2013

Working outside and enjoying the warm day

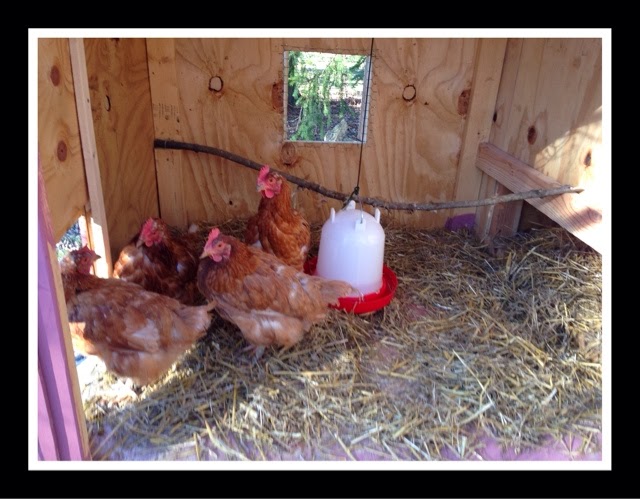
It's a beautiful day here in Northeast Ohio. 54F on December 28th to be exact! We are out and enjoying the weather with a bike ride, chicken coop clean out, and yard work! My poor chickens are molting and so they are looking awfully ratty!
Soon enough spring will be here and their feathers will be back in. Having animals has been a fun experience. It's great knowing where our food comes from and the organic eggs are delicious!
I don't even mind cleaning the coop and the girls are happy to have fresh bedding. 

Update!
The finger paint was a huge hit and didn't leave any stain on her hands or body. She really enjoyed it!
Well time to get back outside! The car isn't going to wash itself ;)

Welcome Home.
 

Thursday, December 26, 2013

DIY Toddler Finger Paint

I like to think of myself as a play at home mom. I plan outings, projects, and games... Who wouldn't want to stay home and play? Tonight I've been preparing our art activity for tomorrow, finger paint! As the good little Pinterest junkie I am, I saved a boat load of glass baby food jars for just such a project (yes I'll take my cookie now). My 20 month old loves to make a mess, squish, squash, and create. So here is my one jar recipe for finger paint!
The Cast:
1/3 c flour
1/4 c water
1 tsp sugar
1 pinch salt
1 small squirt of food color gel or drops
The Story Line:
Mix all but the food coloring with a whisk until smooth. Stir in the color of choice and pour into small container. This recipe fills a 3.5 oz jar & couldn't be easier.
Our high chair is ready for arts & crafts tomorrow! So let loose mommies (&dads) and allow the mess to happen! We will likely turn up the thermostat and do this in just a diaper. Good thing she's already getting a bath tomorrow morning! Happy crafting! -Jenn xo

Welcome Home.


Easy Pizza Pinwheel Recipe

Anything pizza related gets devoured in this house. I try to make some kind of pizza from scratch, once every two weeks or so. Tonight we had pizza pinwheels! Please please please do make the dough! It is so much more delicious this way!

Here's what you'll need:
3/4 c warm water
4 tsp yeast
1/3 c sugar
1 tsp salt
1/2 c shortening
1/2 c egg beaters (or 2 eggs)
4 c flour
*
1 c sauce
2 3.5 oz jars of baby food (Optional- but don't skip your veggies! I used carrots and garden vegetables.)
1 c Shredded cheese (roughly)

How She Does It:
Put the yeast in warm water with sugar and allow to get bubbly (5 minutes). In a mixer with a paddle attachment, add salt, shortening, egg beaters, and 2 c flour and mix until incorporated. Add additional 2 c flour and mix well. Place dough in a warm place until it doubles in size (1 1/2hr). 
Preheat oven to 350F
Cut dough in half. Roll out to 1/4 inch thick. It should be about 12x16 inches or so. Mix the baby food and sauce and spread 1/2 onto the dough. Sprinkle with cheese. Roll the dough tightly into a long log. With a floured knife, cut 12 slices and arrange on a greased cookie sheet. 
Repeat with the other ball of dough. Bake for 18-24 minutes or until golden brown.  
Allow to cool and enjoy! 

I really love these because they are so versatile. You can serve them hot, room temp, or cold. You can make them with ham & cheese, sausage & cheese, or anything you like in the middle. Sneaky mommy snuck the veggies in today! 
And they were a huge hit! I hope you enjoy them as much as we do! -Jenn xo

Welcome Home.


A couple who sweats together, stays together


The hubs and I are at it again. We have begun the "zero" week of our 12 week couples health challenge together. Week 1 begins on Dec 30th and the last day of week 12 will be March 21st. We are doing several programs and I will link you to them below:
http://hundredpushups.com
http://www.twohundredsitups.com
http://www.coolrunning.com

My husband spent 8 years as an active duty marine and continues to serve in the Air Force reserve. He can run many miles and do plenty of sit-ups and push-ups but he is doing this programs with me as my partner and also to improve his form. He has gained a bit of a belly since we had our daughter and he'd like to get back to a size 34 waist. I can run about 1/2 of a mile before I'm toast. I can't do more than 5 sit-ups and lets not even talk about push-ups, ugh! 

So this week we are getting aquatinted with the programs so that next week (week 1) will go smoothly. During our 12 week challenge we will only eat at home or Subway, drink water, juice, or coffee, and eat more green food!

Jenn's (my) Goals for 12 weeks:
50 push-ups
100 sit-ups
Run 5k
Go down a pants size

Eric's Goals for 12 weeks:
100 push-ups
200 sit-ups 
Run less than a 12 minute mile and a half
(To get a better USAF pt test score)
Lose 2 inches off waist measurement

I'll be doing the push-up & sit-up challenge with Eric. He will be running 3-4 miles on his run days while I'll be using the C25K program. All the links are above. Join us for a better you in the next 12 weeks. Because you can do anything for 12 weeks!

Welcome Home.


Tuesday, December 24, 2013

Oh Christmas Tree

Have you heard the song, "Oh Christmas Tree"? I'm sure most of you have. Well, I love Christmas trees. If there was only one decoration I could have in my home, it's that tree. Here in the Baker home, we chop down our tree Thanksgiving weekend. It's a family tradition that has begun this year with in our new home. It's kind of magical to me. When you turn out the lights, the tree just looks so pretty; and every year (for more if us) the tree is a little different. Whether you have a fake tree or real tree, (I dearly hope that you all have a tree) the ornaments will be placed differently and the lights may be hung in another way as well. Every year I cherish the unique tree and the unique memories we make around it. Every year I am reminded of how abundantly blessed we are.
Merry Christmas, enjoy the day our Savior came, let us rejoice and be glad!
xoxo Jenn

Welcome Home.

Sunday, December 22, 2013

Healthy Toddler Cookie

Oh boy, it has been weeks since I've done any baking. Today my 20 month old was watching Sesame Street and started running around saying, "me cookie, me!" So I decided to try modifying a protein bar recipe to make a kid friendly cookie. This is a great catch-all base cookie. It is an easy 3 ingredients and only makes about 12-16 cookies. I did add flaxseeds to mine because I have FlaxFever! It's a low carb, high fiber seed and is rich in omega-3 fatty acids (the good stuff). And let's face it, we could all use a little extra fiber! This recipe worked well for my toddler to help. It comes together so quickly and she really enjoyed being mommy's little helper!
Here it goes:
3/4 c of peanut butter
1 1/2 c oats
2 TBS honey
Optional: raisins, flaxseeds, chia seeds, nuts, ect. I added 3 tsp of flaxseeds to ours which was a great addition and I could have added even more!

Preheat to 375F. Mix all ingredients in a medium size bowl. 
Form into small balls. Place onto a parchment paper lined sheet. I use my silpat for all of my baking and I swear it's magic!
Bake them for 10-14 minutes or until golden brown. You'll know they are almost done when that warm peanut butter smell hits you, mmmmm! 
My little helper got bored during the ball forming stage. Can't find good help these days, sheesh!

Transfer to cooling rack and enjoy! They must be cooled and served with a tall glass of milk. Yum! Comment and tell me about what you put in yours.

Welcome Home.


When your toddler picks her own clothes out...

She winds up looking amish.
At least she matched. Although she really wanted to put on a dress and pj pants but that was a bit much. Happy Sunday everyone!

Welcome Home.

Cute DIY Mantle Decor

While preparing for a dinner party, I felt like my house just didn't feel super Christmas-y! I have a tree and decorations throughout the house but because of my cold living room decor, it just isn't full of warmth. The mantle and natural fireplace were not decorated so yesterday I decided to try to fix that. I found pretty red sparkle ribbon in the basement, as well as extra ornaments and so I got to work. The ornament hooks easily pushed through the mesh ribbon and ended up looking pretty.
A quick and easy DIY mantle decoration. Merry Christmas, now go decorate your lonely mantle!

Welcome Home.

Tuesday, December 17, 2013

Christmas is Creeping

Because sometimes everyone needs a little reality check. 

Today the hubby says to me during a perfectly pleasant car ride, "Hey, only 8 days till christmas!" I asked him if he wanted to ruin my day on purpose? ;) In all honesty I know how many minutes I have left. Unfortunately, this year it feels like Christmas crept up on me like those last 10 lbs I gained. Ugh! 

I haven't bought much for our daughter or the hubs. I even have blisters from the crafting I've been hurrying to finish. Go ahead and say it, you're happy that you started early! 

I have every intention of running to Target tonight to pick up a few more toys for our little one & Christmas cards to send out. But even with just a week to go, my husbands gifts are tricky to pick out. He's the type that will love whatever he opens but he is hard to shop for. 

Even with the stress of gift giving this year, it really is a magical time. Watching as my toddler experiences snow, lights, and Santa is more than worth any stress that comes along with! This weekend I'll finish the shopping and wrapping and at last I'll be done. Merry shopping y'all and as always...

Welcome Home.

Pangkor Island, Malaysia

Pangkor Island, Malaysia
This island is simply breathtaking. I have always wanted to travel to Malaysia and now the hubby and I are starting to plan our 2015 trip there. He likes to think that he is getting a new truck but in reality we are going to one of the most beautiful places on earth.
We've heard great things about the snorkeling and beaches. If you have travelled there or lived there, where would you recommend? We are looking for advice on traveling there. Where are you traveling this year or next?

Welcome Home

Quick and Easy DIY Body Scrub

I have many wonderful people in my life and for that I am so incredibly thankful. With Christmas less than two weeks away, I have been a crafting machine! I won't give too much away but I did want to share a great gift idea for you last minute gift givers. 

This body scrub comes together quickly and easily. It can be customized in many ways to fit the personality of whomever it's for. Today I made a peppermint body scrub but you can use vanilla, lavender, or lemon. 
Here's what you'll need:

2 cups sugar
1/3-1/2 cup of coconut oil
Peppermint extract or essential oil
Food coloring to tint the scrub

Warm the oil in the microwave until it is liquid-y (yes it's a word!) Slowly beat it I to the sugar until you reach a moist consistency without it being too oily. Add in the extract & food coloring until it's reached the fragrance & color level that you like. This recipe filled 5-4oz jars. It works nicely on hands but I prefer using peppermint as a foot scrub. Merry gifting and as always...

Welcome Home.

Thursday, December 12, 2013

A Long Week

Oh Christmas tree, I love thee! ;)
My it has been a long week so far in the Baker home. My daughter came down with a bad rash that was difficult to diagnose, a cold bug made its rounds through our family, the hubby had crazy long days (nights) at work, the Christmas decor went up, and it's only Thursday. 
Some of our chickens started molting. Poor girls decided to lose feathers in the dead of winter. At least it's only temporary but I may add a little heat lamp to their house. This picture was from a week ago when it was 54F and now it's 18F but only 4F with the windchill. 

Despite the cold, I really love this time of year. Tonight, Elena and I cuddled up and watched part of Saving Santa. I love my little cuddle bug. I will confess that I have only bought her a couple of things for Christmas this year so far. Usually I am done the week after thanksgiving but this time I won't really be starting for another week. Ugh! I need a personal shopper, any volunteers? I'll even let you use your own money, ha!

On a side note; if someone gave you a handcrafted gift for Christmas, what would you like to receive?
There's a poll on the right hand side of the screen. If you are viewing from your mobile device, there should be a link for "view web version" at the bottom.

My response would likely be, "all of the above" but that's me. How about you?

Welcome Home.

Wednesday, December 11, 2013

DIY Crochet Headband with Flower

I love nap time. Today it was only 40 minutes long but that was enough time to knock out this headband and attached flower.
Here's the link for the headband tutorial:
https://m.youtube.com/watch?v=iS39tjLyeyk&desktop_uri=%2Fwatch%3Fv%3DiS39tjLyeyk
I made mine short to fit my year and a half old daughter.
Here's the link for the flower:
https://m.youtube.com/watch?v=LRNT5eg7JhA&desktop_uri=%2Fwatch%3Fv%3DLRNT5eg7JhA
It turned out super cute and I'll be gifting this as a stocking stuffer this year :)
Comment with any questions and as always...

Welcome Home.

Easy DIY Crochet Scarf Tutorial

Today's nap time craft/ christmas gift:
Yellow & Navy Blue are my brother's high school colors so naturally this scarf is for him. It was super easy to make and took about 1.5 hrs uninterupted. It is very long but then he is 6ft3. 
How To:
Start by chaining the length you'd like the scarf to be.
Chain three, double crochet into the 4th chain. Continue to double crochet into each chain till you reach the end. Chain three and turn around. Again, continue to double crochet in each double crochet till you reach the end and then repete a 3rd time. If you'd like to change color, now is the time to tie it in. Chain three and turn, creating your last row on this side, double crochet the whole way down. Once you've reached the end, chain two and turn to continue along the short edge of the scarf. Double crochet to the end and repete the chain two, double crochet  down the other long side. Finish it up by completing the last short side and tie it off. 

Comment with any questions you may have.

Note: I used an O sized hook and thick and easy lion brand yarn.

Welcome Home.

Tuesday, December 10, 2013

DIY Blessing Bags: Helping The Needy

"One person can make a difference and every person should try." -JFK

I am a very fortunate person. I have a heated home, food in the pantry, wonderful friends, and a family who loves me as I do them. I may not have the fanciest things but I have what I need and then some. As the weather turns colder, I am reminded how not every one is as fortunate as myself. When I see those in need, namely people begging on the corners, I always give them what I can. I don't care what they do with it because I'll never know. I have bought apples, bread, and peanut butter for a father and son living on the streets. 
A man asked for my left overs as I left a restaurant once. I gladly gave them to him. He ate it so quickly right there before me and even went so far as to drink the cup of dressing. I bought him groceries and searched the area for two hours but couldn't find him. I wept like a child. I have always felt a calling to help. I am lucky to have a spouse who shares this with me. But I disgress.

The idea for these blessing bags came to me a couple of days ago. I have always saved samples of products. I have shower gel, vitamins, shampoo, and more. Today I thought that rather than keeping them for myself I would put together bags for the needy to keep in my car. Here is a photo of my first couple bags.

Contents: 
Plastic Ware
Cotton balls
Qtips
Band aids
Tissue
Hot cocoa mix
Adult Multi-vitamin Chews
Apple
Shower gel
Dial head and body wash
List of local shelter & soup kitchen addresses (in large print!)

I want my daughter to grow up with a servants heart & a desire to help those that need it the most. I emplore you to carry a blessings bag or two as well. 


Welcome Home.


Wednesday, December 4, 2013

Healthy Mini Banana Muffins


Because everything is better when it's fun sized! I combined several recipes to come up with my healthier banana muffin recipe. 
Here's what you'll need:
1/2 stick of unsalted butter (if you can get fresh cream from a friend, churn it yourself, it's to die for!)
1/2 c sugar
1/4 c unsweetened applesauce
2 large eggs from your chickens (or the store, I am spoiled on these fresh eggs)
1 tsp vanilla
3 ripe bananas
1/2 tsp salt
1 1/4 tsp baking soda
1 1/4 c flour
Optional: banana extract, cinnamon, & nutmeg, all to taste.
Cream the butter and sugar together until light and fluffy. 
Beat in the eggs, one at a time and the vanilla.
Mash the bananas and add to mixture. It'll look a little curdled but no worries! At this time you can add a little bit of banana extract if your bananas weren't over ripened yet. Only at 1/4 tsp at a time. You can also add your cinnamon and nutmeg should you be brave enough to experiment. ;) (bill nye the science guy's theme song comes to mind) I use 1-2 tsp of cinnamon (less if it's for guests) and a shake of nutmeg because while I love nutmeg, it must be used sparingly if at all!
Beat in the applesauce.
Gently mix in your dry ingredients until incorporated. Fill mini muffin tins 2/3 of the way full. Should make 30-36 mini muffins. Bake for 14-16 minutes or until toothpick comes out clean. 
That's it. It comes together quickly and bakes fast. These are a nice breakfast especially if we are running late. I hope y'all enjoy them as much as we do :)

Welcome Home.

UPDATE:
We are moving away from refined sugars and this is the recipe we now use:

http://www.laurenslatest.com/skinny-mini-banana-muffins/


Tuesday, December 3, 2013

Easy Sew Minky Blanket DIY


I made this blanket for a recent gift exchange. I liked it a lot and eventually may make one for home. It was so easy. Cut, pin, sew! There was a 30 minute hiccup with my sewing machine but generally went smoothly. 

You'll need:

1 yard of minky fabric
1 1/2 yards of designed fabric
Color appropriate thread and two bobbins worth of the same color. 


The fabric I bought was perfect and I didn't have to cut but once. You want your minky fabric to be 4 inches shorter in length and height than the designed fabric. I folded the designed fabric in to barely touch the minky fabric and then folded it again to cover the minky fabric. This will give you 3 layers to sew together. Do this and pin as you go. Sew along the middle of the fold and again closer to the seem. 

These look darling and couldn't be easier. I will be making 3 more as christmas gifts. Throw questions in the comment area and I'll do my best to help you along. 

Ps the excess fabric makes a great little toddler scarf!

Welcome Home.

Easy Sew Toddler Pajamas


POOF! All of a sudden I have become a lot more comfortable with my sewing machine. I have a basic Singer that was a gift 4-5 years ago from my mom&dad. I have made skirts, dog beds, pjs, and curtains and all have been ok. Tonight I made some pj pants for my 19 month old daugther without a pattern. I used this blog to guide me in making these pants. 

http://mycottoncreations.blogspot.com/2010/07/christmas-eve-pajama-pants-tutorial.html?m=1


Start to finish they took about 1.5 hr for my first pair and that included my sewing machine giving me fits for about 25 minutes. Follow the instructions and if you have any questions feel free to ask! :) these were super fun to make. Thank goodness because I am totally anti-patterns ;).  Happy crafting!

Welcome Home.


Monday, November 25, 2013

Baked Eggplant Parmesan

Nothing is better on a crisp November afternoon than Eggplant Parm. The hubby loves all things italian. I absolutely love this baked eggplant parm recipe even though it takes a little time. File this one under meatless Mondays. I love this recipe because I usually have everything on hand but the eggplant! :)

Baked Eggplant Parmesan

Here's what you'll need:
Pam or oil to grease baking sheets
2 large eggs
3/4 C italian breadcrumbs
3/4 C italian panko
3/4 C shaved or grated parmesan
Salt & Pepper
2 1/2lbs eggplant (2 large ones)
36-48 oz of your favorite red pasta sauce
1 C part skim shredded mozzerella 

Preheat your oven to 375F. Take your eggplants and slice them into 1/2 inch thick, round sections.
Whisk together 2 TBS if water and the eggs. Set these aside in a wide bowl.
Combine s&p, panko, breadcrumbs, and 1/4 C of Parmesan in another bowl.
Dredge your eggplant slices in the egg mixer, allowing the excess to drip off.
Then dredge in the dry mixture.
I then patted it gently and transferred to a greased baking sheet. I'm lazy about clean up so I line my trays with foil first ;)
Once you fill 1 or 2 trays, put them in the oven for 50 minutes. Flip the eggplant half way through.
Remove from oven and turn the heat up to 400F. Pour some sauce to cover the bottom of a 9x13 baking dish. 
Then add a layer of eggplant, a layer of sauce, and then a layer of cheese.
Then repete with remaining eggplant.
Cook in the 400F oven for 15-20 minutes until hot and bubbly!
Let stand for 5 minutes before devouring ;). This makes 10 servings that have about 200 cal per serving. I usually serve this with a salad or green veggie. I hope y'all love it like we do! Comment with any questions you may have.

Welcome Home.